Dnes budeme budovat systém newsletterů pomocí PHP s pozadím MySQL. Výukový program se bude zabývat budováním systému, který umožňuje více seznamů newsletterů a zasílání zpráv do konkrétních seznamů.
Čau lidi, takže budeme budovat docela složitý systém newsletterů, tak pojďme začít! Pro projekt budete potřebovat dva zdroje.
- Sada ikon Hedvábí bude použita k přidání vizuálního „šmrncu“ do aplikace.
- K odesílání našich e-mailů bude použit Swift PHP Mailer.
Krok 1:Vytvořte kostru aplikace
Když spouštím jakýkoli projekt, rád si rozmístím složky, než začnu kódovat, takže to teď udělejme. Nejprve vytvořte celkový adresář projektu. Dále ve složce projektu vytvořte složku s názvem admin. Poté do složky admin přidejte dvě složky s názvy media a swift. Nakonec v adresáři médií vytvořte složku s názvem images. Složku Swift lib můžete také umístit do složky swift, kterou jsme vytvořili. Můžete také zkopírovat šest ikon hedvábí, které budeme používat:
- bullet_green.png
- bullet_red.png
- delete.png
- email_go.png
- najít.png
- page_edit.png
Chystám se strukturovat zbytek tutoriálu o vytváření CRUD:vytvoření, čtení, aktualizace a odstranění pro čtyři z našich šesti modelů. Jedna další bude upravena jinými akcemi a šestá nebudeme vytvářet akce CRUD.
Nyní nejprve vytvořte naši databázi a naše tabulky budeme vytvářet postupně později. Nyní začneme kódovat. Jako poznámku také předpokládám, že budeme pracovat se soubory v naší složce admin, pokud neuvedu jinak, protože většina kódu je v této složce.
Krok 2:Konfigurace aplikace
Každá aplikace bude mít nějaký typ konfiguračního souboru a my teď vytvoříme ten náš. Pokračujte a vytvořte soubor s názvem config.php a přidejte následující:
# admin/config.php
	<?php
	// DB Settings
	define('DB_SERVER', 'localhost');
	define('DB_USER', 'root');
	define('DB_PASSWORD', '');
	define('DB_NAME', 'nettuts_ns_demo');

	define('FROM_EMAIL', 'no_reply@ohyeahemail.com');
	define('FROM_NAME', 'oh yeah email!');


	session_start();
	require_once 'classes.php';
	$mini = false;
	$nonav = false;
	error_reporting(0);
První část tedy nastavuje naše databázové proměnné, takže se ujistěte, že je upravujete tak, aby byla na prvním místě vaše místní konfigurace. Naše další reklama nastavuje některé atributy e-mailu, které použijeme později. Poslední sekce zahájí naši relaci, abychom k ní měli přístup, vyžaduje náš soubor class.php (vytvoříme jej během vteřiny), nastaví výchozí hodnoty pro některé možnosti rozvržení a poté nastaví hlášení chyb na 0, abychom přestali obtěžující varování . Pokud se však zdá, že máte potíže, zkuste tento řádek okomentovat.
Nyní pokračujte a vytvořte náš soubor class.php a přidejte:
# admin/classes.php
	<?php
	// Authentication
	function validate_user($username, $pw) {
	    if (check_username_and_pw($username, $pw)) {
	        header('Location: index.php');
	    } else {
	        $_SESSION['error'] = "Login error.";
	        header('Location: login.php');
	    }
	}

	function logged_in() {
	    if ($_SESSION['authorized'] == true) {
	        return true;
	    } else {
	        return false;
	    }
	}

	function login_required() {
	    if(logged_in()) {
	        return true;
	    } else {
	        header('Location: login.php');
	    }
	}
	// mysql
	function query($sql) {
	  $link = new mysqli(DB_SERVER, DB_USER, DB_PASSWORD, DB_NAME) or die('There was a problem connecting to the database.');

	  $stmt = $link->prepare($sql) or die('error');
	  $stmt->execute();
	  $meta = $stmt->result_metadata();

	  while ($field = $meta->fetch_field()) {
	    $parameters[] = &$row[$field->name];
	  }

	  $results = array();
	  call_user_func_array(array($stmt, 'bind_result'), $parameters);

	  while ($stmt->fetch()) {
	    foreach($row as $key => $val) {
	      $x[$key] = $val;
	    }
	    $results[] = $x;
	  }

	  return $results;
	  $results->close();
	  $link->close();
	}

	function count_query($query) {
	  $link = new mysqli(DB_SERVER, DB_USER, DB_PASSWORD, DB_NAME) or die('There was a problem connecting to the database.');
	  if($stmt = $link->prepare($query)) {
	    $stmt->execute();
	    $stmt->bind_result($result);
	    $stmt->fetch();
	    return $result;
	    $stmt->close();
	  }
	  $link->close();
	}

	function check_username_and_pw($u, $pw) {
	  $link = new mysqli(DB_SERVER, DB_USER, DB_PASSWORD, DB_NAME) or die('There was a problem connecting to the database.');

	  $query = "SELECT * FROM users WHERE username = ? AND password = ? LIMIT 1";
	  if($stmt = $link->prepare($query)) {
	    $p = md5($pw);
	    $stmt->bind_param('ss', $u, $p);
	    $stmt->execute();
	    $stmt->bind_result($id, $username, $pw);
	    if($stmt->fetch()) {
	      $_SESSION['authorized'] = true;
	      $_SESSION['username'] = $username;
	      return true;
	    } else {
	      return false;
	    }
	    $stmt->close();
	  }
	  $link->close();
	}
To je obrovský kus kódu a já to projdu. Naše první funkce zpracovává, když uživatel odešle naše přihlašovací údaje, a poté odešle data naší funkci check_username_and_pw. Naše funkce login_in jednoduše vrátí, zda je uživatel přihlášen. Naše funkce login_required zkontroluje, zda jsme přihlášeni, a pokud ne, pošle nás na přihlašovací stránku.
Další funkce jednoduše pojmenovaná query() předkládá dotaz na naší DB a byla vytvořena Jeffrey Wayem. Aby to bylo ještě jednodušší, přidal jsem funkce vytváření odkazů a zavírání. Naši další funkci jsem vytvořil speciálně proto, abychom mohli snadno spouštět COUNT SQL dotazů a naše funkce check_username_and_pw kontroluje, zda můžeme najít uživatele se stejným e-mailem a heslem hash MD5, a pokud ano, nastaví naše proměnné relace.
Krok 3:Rozvržení aplikace
Náš další soubor, na kterém budeme pracovat, je náš soubor layout.php, takže pokračujte a vytvořte jej. V sekci head jednoduše deklarujeme naše běžné deklarace XHTML. Pokud si všimnete, automaticky přidáme název stránky k jinému řetězci pro náš nadpis. Pak máme šablonu stylů (pokračujte a vytvořte ji také v naší složce médií). Poté otevřeme naši značku těla a zkontrolujeme, zda chceme mini rozvržení, a pokud ano, přidá třídu. Pak máme hlavičku a pak zkontrolujeme, zda chceme naši navigaci, a pokud ano, zobrazíme naše karty. Také jsem přidal způsob, jak přidat aktuální třídu pro každou kartu. Máme také odkaz na odhlášení a pak máme kontejner div. V tomto přidáme značku h3 s naším názvem a poté odpovíme na náš obsah.
# admin/layout.php
	<!DOCTYPE html PUBLIC "-//W3C//DTD XHTML 1.1//EN" "https://www.w3.org/TR/xhtml11/DTD/xhtml11.dtd">
	<html xmlns="https://www.w3.org/1999/xhtml" >
	    <head>
	        <meta http-equiv="Content-Type" content="text/html; charset=utf-8" />

	        <title><?php echo $title; ?> » my newsletter app</title>
	        <!-- Stylesheets -->
	        <!-- <link rel="stylesheet" href="media/style.css" type="text/css" media="all" /> -->
	    </head>
	    <body<?php if ($mini == true) { ?> class="mini"<?php } ?>>
	        <div id="header">
	            <h1><a href="index.php">my newsletter app</a></h1>
	        </div>
	        <?php if ($nonav == false) { ?>
	        <div id="nav">
	            <a href="messages.php"<?php if($tab == 'mess') {?>class="current"<?php } ?>>messages</a>
	            <a href="subscribers.php"<?php if($tab == 'sub') {?>class="current"<?php } ?>>subscribers</a>
	            <a href="newsletters.php"<?php if($tab == 'nl') {?>class="current"<?php } ?>>newsletters</a>
	            <a href="templates.php"<?php if($tab == 'temp') {?>class="current"<?php } ?>>templates</a>
	            <span class="right">
	                <a href="logout.php">log out</a>
	            </span>
	        </div>
	        <?php } ?>
	        <div id="container">
	            <h3><?php echo $title;?></h3>
	            <?php echo $content; ?>
	        </div>
	    </body>
	</html>
Nyní vytvoříme naši stránku index.php, abychom mohli stylizovat. Otevřete index.php a přidejte:
# admin/index.php
		<?php
		require_once 'config.php';
		$title = "Home!";
		$content = <<<EOF
		<h3>current stats</h3>
		Our home page!
		EOF;
		include 'layout.php'; ?>
V tomto tedy potřebujeme náš konfigurační soubor, nastavíme náš nadpis a pak nastavíme proměnnou obsahu a nakonec potřebujeme náš soubor rozvržení. Při prvním otevření by měl vypadat takto:


Nyní otevřete naši šablonu stylů. Rád používám 960.gs reset a styly typografie, komprimované v TextMate. Horní část mého souboru CSS tedy vypadá takto:
# admin/media/style.css
	/* reset */
	html,body,div,span,applet,object,iframe,h1,h2,h3,h4,h5,h6,p,blockquote,pre,a,abbr,acronym,address,big,cite,code,del,dfn,em,font,img,ins,kbd,q,s,samp,strike,strong,sub,sup,tt,var,b,u,i,center,dl,dt,dd,ol,ul,li,fieldset,form,label,legend,table,caption,tbody,tfoot,thead,tr,th,td{margin:0;padding:0;border:0;outline:0;font-size:100%;vertical-align:baseline;background:transparent}body{line-height:1}ol,ul{list-style:none}blockquote,q{quotes:none}blockquote:before,blockquote:after,q:before,q:after{content:'';content:none}:focus{outline:0}ins{text-decoration:none}del{text-decoration:line-through}table{border-collapse:collapse;border-spacing:0}
	/* typography */
	body{font:13px/1.5 Helvetica,Arial,'Liberation Sans',FreeSans,sans-serif}a:focus{outline:1px dotted invert}hr{border:0 #ccc solid;border-top-width:1px;clear:both;height:0}h1{font-size:25px}h2{font-size:23px}h3{font-size:21px}h4{font-size:19px}h5{font-size:17px}h6{font-size:15px}ol{list-style:decimal}ul{list-style:square}li{margin-left:30px}p,dl,hr,h1,h2,h3,h4,h5,h6,ol,ul,pre,table,address,fieldset{margin:10px 0;}
Nejprve upravíme styl našich hlavních prvků, takže přidejte následující styly:
# admin/media/style.css
	#header {width:85%; margin:0 auto;}
	#header h1 a {text-decoration:none; color:#000;}
	#container {width:85%; background: #111; margin:5px auto; color:#fff; padding:10px;}
Vaše stránka by nyní měla vypadat takto:


Nyní, když upravíme styl karet s navigačním pozadím a poté s pozadím při najetí myší na každý z odkazů, měli byste vidět:
# admin/media/style.css
	/* tabs */
	#nav {margin:0 auto 2px;padding:10px;width:85%; background:#444;}
	#nav a { padding:12px 10px; margin:0; color:#fff; text-decoration:none; text-align:center;}
	#nav a.current, #nav a:hover {background:#111;}
#nav span.right {float:right;} 


Nyní, zatímco pracujeme na souboru, pokračujte a přidejte následující styly pro naše mini rozvržení, vstupy do formulářů, tabulky, velké odkazy a naše chybové a úspěšné zprávy.
# admin/media/style.css
	body.mini #header {width:30%; text-align:center;}
	body.mini #container {width:30%;}

	/* form */
	form input.text {width:95%; font-size:16px;}
	form textarea {width:95%; height:100%;}
	/* table */
	table {width:98%; text-align:right; border:rgb(128,128,128); font-size:12px; margin:5px 10px; color:#000;background:#fff;}
	table th {background-color: rgb(229, 229, 229); border:1px solid rgb(187, 187, 187); padding:3px 6px; font-weight:normal; color:#000;}
	table tr td {border: 1px solid rgb(221, 221, 221); padding:3px 6px;}
	table tr:hover {background-color: rgb(240, 240, 240);color:#000;}
	/* a */
	a.large {padding: 5px; color:#000; background:#eee; text-decoration:none; margin:5px;}
	a.large.right {float:right;}
	a.large:hover, a.large.current {background:#444; color:#fff;}
	/* messages */
	#message {margin: 5px 10px; padding: 4px; display:block;text-align:center;}
	#message.error {background:#FFEBE8;border: 1px solid #CC0000;color:#CC0000;}
	#message.success {border:solid 1px #349534; background:#C9FFCA;color:#008000;}
To jsou některé styly, které rád používám ve všech svých projektech. Nyní, když jsme dokončili rozložení, budeme pokračovat v ověřování.
Krok 4:Ověření
Budeme pracovat s velmi jednoduchým autentizačním systémem. Vytvořte login.php a vložte do něj následující:
# admin/login.php
	<?php
	require_once 'config.php';
	if(logged_in()) {header('Location: index.php');}
	$title = "login";
	$nonav = true;
	$mini = true;
	if($_POST && (!empty($_POST['username']) ) && (!empty($_POST['password']))) {
	    validate_user($_POST['username'], $_POST['password']);
	}
	$error = $_SESSION['error'];
	$content = <<<EOF
	$error
	<form action="login.php" method="post">
	    <p>
	        <label for="username">username:</label><br />
	        <input type="text" name="username" class="text" />
	    </p>
	    <p>
	        <label for="password">password:</label><br />
	        <input type="password" name="password" class="text" />
	    </p>
	    <p>
	        <input type="submit" value="login" />
	    </p>
	</form>
	EOF;
	include 'layout.php'; ?>
Vysvětlím každou část kódu. Nejprve potřebujeme náš konfigurační soubor. Dále zkontrolujeme, zda jsme přihlášeni, a pokud ano, přesměrujeme domů. Dále nastavíme nadpis a naše možnosti rozvržení. Poté zkontrolujeme, zda máme POST a zda měl POST uživatelské jméno a heslo, a pokud ano, zavoláme funkci validate_user z našeho souboru tříd. Dále nastavíme chybu proměnné na chyby naší relace a poté nastavíme náš formulář a vypíšeme všechny chyby. Nyní vytvoříme naši odhlašovací stránku, takže vytvořte logout.php a vložte do ní následující:
# admin/logout.php
	<?php
	require_once 'config.php';
	$_SESSION = array();
	session_destroy();
	header('Location: login.php');
	?>
Znovu požadujeme náš konfigurační soubor, nastavíme naši relaci na prázdné pole, poté naši relaci zničíme a přesměrujeme na naši přihlašovací stránku. Nyní, když jste toto vše udělali, vaše přihlašovací stránka by měla vypadat takto:


Chystáme se také vytvořit uživatelský záznam (a naši tabulku), abychom mohli přidat autentizační logiku a mohli si prohlížet stránky s kódem dopředu. Chcete-li vytvořit uživatele s uživatelským jménem admin a tajným heslem. Chcete-li to přidat, spusťte tento SQL:
CREATE TABLE `users` (
	   `id` int(10) AUTO_INCREMENT,
	   `username` varchar(50),
	   `password` varchar(32),
	   PRIMARY KEY (`id`)
	) ENGINE=MyISAM DEFAULT CHARSET utf8;

	INSERT INTO `users` (`id`, `username`, `password`) VALUES
	('1', 'admin', '5ebe2294ecd0e0f08eab7690d2a6ee69');
Krok 5:Informační bulletiny
Tuto aplikaci jsem navrhl tak, aby byla velmi flexibilní. Chtěl jsem, abyste (uživatel) mohli vytvářet a spravovat tolik newsletterů, kolik chcete. Nejprve tedy musíme vytvořit naši databázovou tabulku. Zde je kód SQL z exportu v mé ukázkové aplikaci:
	CREATE TABLE `newsletters` (
	   `id` int(10) AUTO_INCREMENT,
	   `name` varchar(50),
	   `description` varchar(255),
	   `visible` varchar(10),
	   PRIMARY KEY (`id`)
	) ENGINE=MyISAM DEFAULT CHARSET utf8;
Takže teď, když máme naši tabulku newsletterů, vytvoříme stránky pro každou akci. Vytvořte čtyři soubory pojmenované:newsletters.php, newsletters_delete.php, newsletters_edit.php a newsletters_new.php. Nejprve otevřete newsletters.php:
# admin/newsletters.php
	<?php
	require_once 'config.php';
	login_required();
	$title = "newsletters";
	$newsletters = query("SELECT * FROM newsletters ORDER BY id ASC");
	$tab = 'nl';
	$table = "";
	foreach($newsletters as $row) {
	    $dlink = '<a href="newsletters_delete.php?id='.$row['id'].'" onclick="return confirm(\'Are you sure you want to delete this newsletter?\');" title="delete"><img src="media/images/delete.png" alt="delete"/></a>';
	    $elink = '<a href="newsletters_edit.php?id='.$row['id'].'" title="edit" ><img src="media/images/page_edit.png" alt="edit"/></a>';
	    if($row['visible'] == "1") {$visible = '<img src="media/images/bullet_green.png" />';} else {$visible = '<img src="media/images/bullet_red.png" />';}
	    $table .= "<tr><td>".$row['id']."</td><td>".$row['name']."</td><td>".$row['description']."</td><td>$visible</td><td>".$dlink." ".$elink."</td></tr>\n";
	}
	$message = error_messages();
	$content = <<<EOF
	<a href="newsletters_new.php" class="large">new newsletter »</a>
	$message
	<table>
	    <tr>
	        <th></th>
	        <th>name</th>
	        <th>description</th>
	        <th>visible</th>
	        <th></th>
	    </tr>
	    $table
	</table>
	EOF;
	include 'layout.php'; ?>
Tento soubor má tedy stejný základní dojem jako naše přihlašovací stránka. Požadujeme naši konfiguraci, ujistěte se, že jsme přihlášeni, nastavte náš název. Dále použijeme naši funkci query() k provedení SELECT dotazu, abychom našli všechny naše zpravodaje. Poté nastavíme aktuální kartu pro naše rozložení. Poté, co projdeme polem vráceným naším dotazem, a vytvoříme rozložení tabulky. Poté zavoláme dosud neznámou funkci a vytvoříme naši stránku. Než budete moci stránku zobrazit, budete muset do svého souboru class.php přidat následující, abyste mohli snadno zpracovávat naše chybové zprávy:
# admin/classes.php
	// Render error messages
	function error_messages() {
	    $message = '';
	    if($_SESSION['success'] != '') {
	        $message = '<span class="success" id="message">'.$_SESSION['success'].'</span>';
	        $_SESSION['success'] = '';
	    }
	    if($_SESSION['error'] != '') {
	        $message = '<span class="error" id="message">'.$_SESSION['error'].'</span>';
	        $_SESSION['error'] = '';
	    }
	    return $message;
	}
I když pravděpodobně nebudete mít žádná data, když budete mít několik záznamů, bude to vypadat takto:(i když o něco méně zmáčknuté)


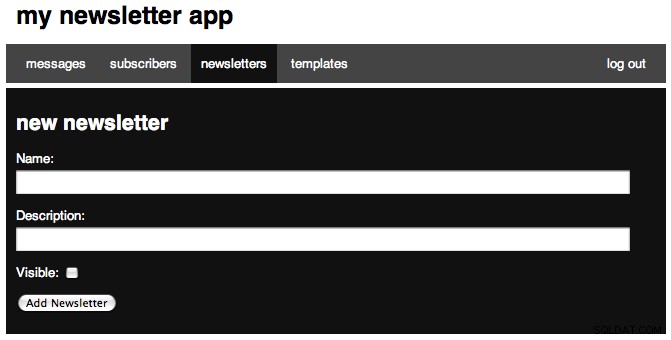
Nyní budeme pracovat na naší nové akci, takže otevřete newsletters_new.php a přidejte následující:
# admin/newsletters_new.php
	<?php
	require_once 'config.php';
	login_required();
	$tab = 'nl';

	if(isset($_POST['submitted'])) {
	    $link = new mysqli(DB_SERVER, DB_USER, DB_PASSWORD, DB_NAME) or die('There was a problem connecting to the database.');
	    $sql = "INSERT INTO NEWSLETTERS (name, description) VALUES ( '".$_POST['name']."' , '".$_POST['description']."' )";
	    $stmt = $link->query($sql) or die($link->error);
	    $stmt->close;
	    $_SESSION['success'] = "Added newsletter.";
	    header('Location: newsletters.php');
	}
	$title = "new newsletter";
	$content = <<<EOF
	<form action="newsletters_new.php" method='POST'>
	    <p>
	        <label for="name">Name:</label><br />
	        <input type='text' name='name' class="text" />
	    </p>
	    <p>
	        <label for="description">Description:</label>
	        <input type="text" name="description" class="text" />
	    </p>
	    <p>
	        <input type='submit' value='Add Newsletter' />
	        <input type='hidden' value='1' name='submitted' />
	    </p>
	</form>
	EOF;
	include 'layout.php'; ?>
Doufám tedy, že jste si všimli vzoru v horní části každého z našich souborů. Nejprve vyžadujeme náš soubor config.php, pak se ujistíme, že jsme přihlášeni, a poté nastavíme naši aktuální kartu a poté přidáme nějakou extra logiku pro zpracování POST a poté nastavíme náš nadpis, náš obsah a poté vykreslíme stránku. Sekce POST je poměrně jednoduchá na pochopení, takže ji rychle vysvětlím.
Nejprve zkontrolujeme, zda byla odeslána položka se jménem odeslané. Toto je skryté pole, které máme za tlačítkem Odeslat. Dále vytvoříme odkaz na naši databázi pomocí proměnných z našeho konfiguračního souboru. Dále vytvoříme náš SQL vkládací dotaz pomocí našich POSTed proměnných. Dále se dotazujeme (nikoli naší funkcí) do databáze, a pokud dojde k chybě, zobrazíme vrácenou chybu. Dále dotaz zavřeme, nastavíme naši zprávu o úspěchu a poté přesměrujeme na stránku výpisu. Vaše stránka by měla vypadat takto:


Dále budeme pracovat na naší editační stránce a přidáme následující:
# admin/newsletters_edit.php
	<?php
	require_once 'config.php';
	login_required();
	$tab = 'nl';

	if(isset($_POST['submitted'])) {
	    $link = new mysqli(DB_SERVER, DB_USER, DB_PASSWORD, DB_NAME) or die('There was a problem connecting to the database.');
	    if(isset($_POST['visible'])) {$visible = 1;}else{$visible = 0;}
	    $sql = "UPDATE NEWSLETTERS SET name='".$_POST['name']."', description='".$_POST['description']."', visible=".$visible." WHERE id=".$_POST['id']."";
	    $stmt = $link->query($sql) or die($link->error);
	    $stmt->close;
	    $_SESSION['success'] = "Edited newsletter.";
	    header('Location: newsletters.php');
	}
	$title = "edit newsletter";
	$id = (int) $_GET['id'];
	$results = query("SELECT * FROM newsletters WHERE id='".$id."' LIMIT 1");
	$name = $results[0]['name'];
	$description = $results[0]['description'];
	$visible = ($results[0]['visible'] == "1") ? 'checked="checked"' : '';
	$content = <<<EOF
	<form action="newsletters_edit.php" method='POST'>
	    <p>
	        <label for="name">Name:</label><br />
	        <input type='text' name='name' class="text" value="$name" />
	    </p>
	    <p>
	        <label for="description">Description:</label>
	        <input type="text" name="description" class="text" value="$description" />
	    </p>
	    <p>
	        <label for="visible">Visible:</label>
	        <input type="checkbox" name="visible" value="true" $visible/>
	    </p>
	    <p>
	        <input type='submit' value='Edit Newsletter' />
	        <input type='hidden' value='1' name='submitted' />
	        <input type='hidden' value='$id' name='id' />
	    </p>
	</form>
	EOF;
	include 'layout.php'; ?>
Stejně jako všechny naše soubory začínáme se stejným blokem. Po našem bloku POST (o kterém budu mluvit za sekundu) nastavíme id na naše požadované id a ujistěte se, že je to celé číslo. Poté použijeme naši dotazovací funkci k vyhledání newsletteru, se kterým pracujeme, a nastavíme několik proměnných pro vrácené výsledky. Můžete se ptát, proč jsme dali [0] předtím, než jsme požadovali každou hodnotu, a důvodem je, že dotazovací funkce vrací pole všech záznamů a každý záznam je pole, takže potřebujeme přistupovat k prvnímu poli v naší proměnné výsledků. . Řádek, kde nastavujeme proměnnou viditelná if, je ve skutečnosti komprimovaný příkaz if/else. část if je ==1, pak pokud je to pravda, proměnná je nastavena na zaškrtnuto, jinak na nic. Pak máme náš formulář.
Náš blok POST je velmi podobný naší nové stránce a na ostatních stránkách bude vždy začínat stejným způsobem. Poté zkontrolujeme, zda bylo zaškrtávací políčko zaškrtnuto, a znovu zde nastavíme proměnnou. Pak máme náš dotaz UPDATE, znovu spustíme dotaz, nastavíme naši zprávu o úspěchu a poté přesměrujeme domů. TAKTO vypadá formulář a zpráva po úpravě:


Poslední stránka této sekce je nejjednodušší, protože jde o stránku pro odstranění. Otevřete soubor a vložte do následujícího:
# admin/newsletters_delete.php
	<?php
	require_once 'config.php';
	login_required();
	$id = (int) $_GET['id'];
	$link = new mysqli(DB_SERVER, DB_USER, DB_PASSWORD, DB_NAME) or die('There was a problem connecting to the database.');
	$sql = "DELETE FROM newsletters WHERE id=$id LIMIT 1";
	$stmt = $link->query($sql) or die($link->error);
	if($link->affected_rows) {
	    $_SESSION['success'] = "Newsletter deleted.";
	} else {
	    $_SESSION['error'] = 'Nothing deleted.';
	}
	header('Location: newsletters.php');
V tomto bloku požadujeme naši konfiguraci, ujistěte se, že jsme přihlášeni, pak uložte požadované id do proměnné, vytvořte připojení k MySQL, nastavte náš SQL dotaz a poté spusťte dotaz. Dále zkontrolujeme, zda byl řádek ovlivněn, a vhodně nastavíme zprávu. Poté přesměrujeme na stránku newsletterů. Gratulujeme, dokončili jste první ze čtyř sekcí CRUD. Dále budeme pracovat na CRUD pro naše šablony.
Krok 6:Šablony
Naše aplikace také umožní více šablon, všechny uložené v databázi. Nejprve vytvořte naši databázovou tabulku:
	CREATE TABLE `templates` (
	   `id` int(10) AUTO_INCREMENT,
	   `name` varchar(50),
	   `columns` tinyint(5),
	   `body` text,
	   PRIMARY KEY (`id`)
	) ENGINE=MyISAM DEFAULT CHARSET utf8;
Máme sloupec id s automatickým přírůstkem, sloupec s názvem, sloupec sloupců pro uložení počtu sloupců (aplikace se škáluje pouze na 2 sloupce, což by mělo stačit, ale lze je snadno rozšířit. Lze to také použít pro různé sekce .) a naše tělo. Stejně jako minule musíme udělat každou naši stránku a budeme mít stránku templates.php, dále templates_new.php, templates_edit.php, templates_delete.php a templates_preview.php. Nejprve budeme pracovat na našem souboru templates.php, takže jej otevřete a vložte:
# admin/templates.php
	<?php
	require_once 'config.php';
	login_required();
	$title = "templates";
	$tab = 'temp';
	$templates = query("SELECT id,name,columns FROM templates ORDER BY id ASC");
	$table = "";
	foreach($templates as $row) {
	    $plink = '<a href="" onClick="window.open(\'templates_preview.php?id='.$row['id'].'\',width=800,height=600)" title="preview"><img src="media/images/find.png" alt="preview"/></a>';
	    $dlink = '<a href="templates_delete.php?id='.$row['id'].'" onclick="return confirm(\'Are you sure you want to delete this template?\');" title="delete"><img src="media/images/delete.png" alt="delete"/></a>';
	    $elink = '<a href="templates_edit.php?id='.$row['id'].'" title="edit"><img src="media/images/page_edit.png" alt="edit"/></a>';
	    $table .= "<tr><td>".$row['id']."</td><td>".$row['name']."</td><td>".$row['columns']."</td><td>".$plink." ".$dlink." ".$elink."</td></tr>\n";
	}
	$message = error_messages();
	$content = <<<EOF
	<a href="templates_new.php" class="large">new template »</a>
	$message
	<table>
	    <tr>
	        <th></th>
	        <th>name</th>
	        <th>columns</th>
	        <th></th>
	    </tr>
	    $table
	</table>
	EOF;
	include 'layout.php'; ?>
Opět začínáme se základy. Poté vytvoříme dotaz, abychom našli všechny naše šablony. Poté procházíme každé pole v šablonách a vytvoříme tabulku. Poté dostáváme naše chybové (a úspěšné) zprávy a poté náš obsah. Vaše stránka by měla vypadat nějak takto:


Nyní přejděte na naši novou stránku a vložte následující:
# admin/templates_new.php
	<?php
	require_once 'config.php';
	login_required();
	$tab = 'temp';
	if(isset($_POST['submitted'])) {
	    $link = new mysqli(DB_SERVER, DB_USER, DB_PASSWORD, DB_NAME) or die('There was a problem connecting to the database.');
	    $sql = "INSERT INTO templates (name, columns, body) VALUES ( '".$_POST['name']."' , ".$_POST['columns'].", '".mysql_real_escape_string($_POST['body'])."' )";
	    $stmt = $link->query($sql) or die($link->error);
	    $stmt->close;
	    $_SESSION['success'] = "Added template.";
	    header('Location: templates.php');
	}
	$title = "new template";
	$content = <<<EOF
	<form action="templates_new.php" method='POST'>
	    <p>
	        <label for="name">Name:</label><br />
	        <input type='text' name='name' class="text" />
	    </p>
	    <p>
	        <label for="columns">Columns</label>
	        <select name="columns">
	            <option value="1">Single Column Layout</option>
	            <option value="2">Two Column Layout</option>
	        </select>
	    </p>
	    <p>
	        <label for="description">Body: (raw html)</label><br />
	        Use %content% for a single column layout, %leftcol% and %rightcol% for a two column layout.<br />
	        <textarea name="body" rows="35"></textarea>
	    </p>
	    <p>
	        <input type='submit' value='Add Template' />
	        <input type='hidden' value='1' name='submitted' />
	    </p>
	</form>
	EOF;
	include 'layout.php'; ?>
Takže opět máme stejnou hlavičku. Náš POST opět vytvoří připojení MySQL, poté vytvoříme náš dotaz a pomocí mysql_real_escape_string povolíme vstup libovolným znakům do záznamu, a poté provedeme náš dotaz, nastavíme naši zprávu o úspěchu a přesměrujeme na náš seznam šablon. Pokud se podíváte na náš formulář, žádám také o vložení proměnných pro náš obsah a později vám ukážu, jak to přijde do hry, když spojíme zprávu se šablonou. Vaše stránka by měla vypadat takto:


Dále budeme pracovat na naší editační stránce. Pokud jste si všimli, velká část tohoto kódu je zkopírována a vložit do všech stejných akcí, takže si to ulehčete.
# admin/templates/edit.php
	<?php
	require_once 'config.php';
	login_required();
	$tab = 'temp';
	if(isset($_POST['submitted'])) {
	    $link = new mysqli(DB_SERVER, DB_USER, DB_PASSWORD, DB_NAME) or die('There was a problem connecting to the database.');
	    $sql = "UPDATE templates SET name='".$_POST['name']."', body='".mysql_real_escape_string($_POST['body'])."', columns=".$_POST['columns']." WHERE id=".$_POST['id']."";
	    $stmt = $link->query($sql) or die($link->error);
	    $stmt->close;
	    $_SESSION['success'] = "Edited template.";
	    header('Location: templates.php');
	}
	$title = "edit template";
	$id = (int) $_GET['id'];
	$results = query("SELECT * FROM templates WHERE id='".$id."' LIMIT 1");
	$name = $results[0]['name'];
	$templatedata = stripslashes(htmlspecialchars($results[0]['body']));
	$content = <<<EOF
	<form action="templates_edit.php" method='POST'>
	    <p>
	        <label for="name">Name:</label><br />
	        <input type='text' name='name' class="text" value="$name"/>
	    </p>
	    <p>
	        <label for="columns">Columns</label>
	        <select name="columns">
	            <option value="1">Single Column Layout</option>
	            <option value="2">Two Column Layout</option>
	        </select>
	    </p>
	    <p>
	        <label for="body">Body: (raw html)</label><br />
	        Use %content% for a single column layout, %leftcol% and %rightcol% for a two column layout.<br />
	        <textarea name="body" rows="35">$templatedata</textarea>
	    </p>
	    <p>
	        <input type='submit' value='Edit Template' />
	        <input type='hidden' value='1' name='submitted' />
	        <input type='hidden' value='$id' name='id' />
	    </p>
	</form>
	EOF;
	include 'layout.php'; ?>
We start with the same intro, then our POST block, our title, then our requested id. After, we try and find the template we are working with, then sets three variables so that we can inset them into our content block. We also convert all of the tags we stored to HTML characters so everything will display. When looking at our POST block, you will notice we create our link, then our query and again use mysql_real_escape_string to save everything, execute our query, and then set our message, and redirect to our templates list. Your edit page (with a sample record) should look like:


Now we will create another delete page, so open up our delete page and paste in:
# admin/templates_delete.php
	<?php
	require_once 'config.php';
	login_required();
	$id = (int) $_GET['id'];
	$link = new mysqli(DB_SERVER, DB_USER, DB_PASSWORD, DB_NAME) or die('There was a problem connecting to the database.');
	$sql = "DELETE FROM templates WHERE id=$id LIMIT 1";
	$stmt = $link->query($sql) or die($link->error);
	if($link->affected_rows) {
	    $_SESSION['success'] = "Template deleted.";
	} else {
	    $_SESSION['error'] = 'Nothing deleted.';
	}
	header('Location: templates.php');
I hope you have picked up the pattern here, this is a very simple page. Now we are going to work on an extra page that is not part of the CRUD spectrum; we are going to create a preview page. The binoculars in the action part on the table is the link for each one (in a new window). So open up our preview page. The page is very simple, we find our template and echo the data, and then append a javascript close button. The code looks like:
# admin/templates_preview.php
	<?php
	require_once 'config.php';
	login_required();
	$id = (int) $_GET['id'];
	$data = query("SELECT body FROM templates WHERE id=$id LIMIT 1");
	$template = $data[0]['body'];
	?>
	<?php echo $template; ?>
	<center><button type="button" onclick="self.close();">close window</button></center>
And an example preview looks like:


Now we have finished with our Templates, we are ready to move onto the next step!
Step 7:Subscribers
So now we are going to work with our subscribers! We are going to create two tables. The first:
CREATE TABLE `subscribers` (
	   `id` tinyint(10) AUTO_INCREMENT,
	   `name` varchar(50),
	   `email` varchar(50),
	   PRIMARY KEY (`id`)
	) ENGINE=MyISAM DEFAULT CHARSET utf8;
Refers to each subscriber, and the second:
CREATE TABLE `subscriptions` (
	   `id` tinyint(10) AUTO_INCREMENT,
	   `subscriber_id` tinyint(10),
	   `newsletter_id` tinyint(10),
	   PRIMARY KEY (`id`)
	) ENGINE=MyISAM DEFAULT CHARSET utf8;
Creates a table for our many-to-many relationship with our newsletters. A subscriber can have multiple subscription to newsletters, so they can subscribe to multiple ones, and each newsletter can have many subscribers. To create the most dynamic solution, we have a linking table.
Let's first create our files. The files we are going are going to have are subscribers.php, subscribers_delete.php, and subscribers_edit.php. Our create action will be created later for the front-end. First open up subscribers.php and paste in:
# admin/subscribers.php
	<?php
	require_once 'config.php';
	login_required();
	$title = "subscribers";
	$tab = 'sub';
	$table = "";
	$messages = query("SELECT * FROM subscribers ORDER BY id ASC");
	foreach($messages as $row) {
		$dlink = '<a href="subscribers_delete.php?id='.$row['id'].'" onclick="return confirm(\'Are you sure you want to delete this subscriber?\');" title="delete"><img src="media/images/delete.png" alt="delete"/></a>';
		$elink = '<a href="subscribers_edit.php?id='.$row['id'].'" title="edit"><img src="media/images/page_edit.png" alt="edit"/></a>';
		$table .= '<tr><td>'.$row['id'].'</td><td>'.$row['name'].'</td><td>'.$row['email'].'</td><td>'.$dlink.' '.$elink.'</td></tr>';
	}
	$message = error_messages();
	$content = <<<EOF
	$message
	<table>
		<tr>
			<th></th>
			<th>name</th>
			<th>email</th>
			<th></th>
		</tr>
		$table
	</table>
	EOF;
	include 'layout.php'; ?>
We have basically the same listing pages as before, except this time we will be finding our subscribers. Your page (with some sample data) should look like:


Now we will move on to our edit page:
# admin/subscribers_edit.php
	<?php
	require_once 'config.php';
	login_required();
	$tab = 'sub';

	if(isset($_POST['submitted'])) {
	    $id = (int) $_POST['id'];
	    $link = new mysqli(DB_SERVER, DB_USER, DB_PASSWORD, DB_NAME) or die('There was a problem connecting to the database.');
	    $sql = "UPDATE subscribers SET name='".$_POST['name']."', email='".$_POST['email']."' WHERE id=$id";
	    $stmt = $link->query($sql) or die($link->error);
	    $stmt->close;

	    foreach($_POST['newsletter'] as $n) {
	        if($n['exists'] != '1' && $n['subscribe'] == "true") { // If we want to subscribe but the record doesnt exist
	            $nlid = $n['nlid'];
	            $sql = "INSERT INTO subscriptions (subscriber_id, newsletter_id) VALUES ('$id', '$nlid')";
	            $stmt = $link->query($sql) or die($link->error);
	            $stmt->close;
	        } elseif ($n['exists'] == '1' && $n['subscribe'] != "true") {// Else if we had an exits but we want to unsubscribe
	            $subid = $n['subid'];
	            $sql = "DELETE FROM subscriptions WHERE id=$subid LIMIT 1";
	            $stmt = $link->query($sql) or die($link->error);
	            $stmt->close;
	        }
	    }
	    $_SESSION['success'] = "Edited subscriber.";
	    header('Location: subscribers.php');
	}
	$title = "edit newsletter";
	$id = (int) $_GET['id'];

	$subscriber = query("SELECT * FROM subscribers WHERE id='$id'");
	$name = $subscriber[0]['name'];
	$email = $subscriber[0]['email'];

	$newsletters = query("SELECT * FROM newsletters");
	$subs = query("SELECT * FROM subscriptions WHERE subscriber_id='".$id."'");
	$subscriptions = '';
	foreach($newsletters as $nl) {
	    $s = false;
	    $subid = '';
	    foreach($subs as $sub) {
	        if($sub['newsletter_id'] == $nl['id']) {$s = true; $subid = $sub['id'];}
	    }
	    $checked = ($s == true) ? 'checked="checked"' : '';
	    $subscriptions .= '
	    <input type="checkbox" name="newsletter['.$nl["id"].'][subscribe]" value="true" '.$checked.'/>
	    <label for="newsletter['.$nl["id"].']">'.$nl['name'].'</label>
	    <input type="hidden" name="newsletter['.$nl["id"].'][exists]" value="'.$s.'" />
	    <input type="hidden" name="newsletter['.$nl["id"].'][nlid]" value="'.$nl['id'].'" />
	    <input type="hidden" name="newsletter['.$nl["id"].'][subid]" value="'.$subid.'" /><br />
	    ';


	}
	$content = <<<EOF
	<form action="subscribers_edit.php" method='POST'>
	    <p>
	        <label for="name">Name:</label><br />
	        <input type='text' name='name' class="text" value="$name" />
	    </p>
	    <p>
	        <label for="email">Email</label><br />
	        <input type="text" name="email" class="text" value="$email" />
	    </p>
	    <p>
	        <strong>Newsletters:</strong><br />
	        $subscriptions
	    </p>
	    <p>
	        <input type='submit' value='Edit Subscriber' />
	        <input type='hidden' value='1' name='submitted' />
	        <input type='hidden' value='$id' name='id' />
	    </p>
	</form>
	EOF;
	include 'layout.php'; ?>
This page is fairly different so I will explain each part. The header is the same we have been using. I'll skip the POST block and come back to it. We then continue the same code. We next find our current subscriber. Next we find all newsletters (this includes ones that are not visible - visible mean visible to the public) and then all of the subscriber's subscriptions. We next loop through every newsletter record returned, we next reset some values. Next, we loop through every subscription the user has, and if the subscription's newsletter_id is equal to the current newsletter we are looping we set $s true, and $subid equal to the subscription id. We then set the variable $checked equal to either checked or nothing depending on whether a subscription was found for this subscriber and the current newsletter in the loop. Next we create the checkbox form area, with a lot of hidden fields. First, we have the actual checkbox with a name that will create an array for each checkbox. We then have our label, and next we output whether or not the subscription exists, the newsletter_id and then the subscription_id for when the subscription exists. After which we have our normal content.
Now, if we move on to our POST block. We first get the id posted from our hidden field at the bottom. We next create our MySQL link. Next we have our first SQL query where we update the subscriber record. Next we loop through every newsletter checkbox. The first conditional statement checks to see if the POSTed data says we do not have an existing subscription, and the user wants to subscribe to the newsletter. To handle this, we are going to perform a SQL INSERT into our subscriptions table where our subscriber_id is the same as the user_id we are editing, and newsletter_id equal to the 'nlid' value POSTed by one of our hidden fields. We then execute that SQL INSERT query. The elseif conditional statement says that if our subscription exists, but the checkbox was unchecked so we unsubscribe, we need to delete the subscription. We handle this with a SQL DELETE query. To form our query we set $subid equal to the posted value for our 'subid'. We then create our query by deleting the record where the subscription id equals our variable of $subid. Next we execute the query, set our session success message, and then redirect back to our subscribers page. Your final edit page should look like:(filled with sample data)


We have one last page to work on for the subscribers part of the backend:the delete page. Just like before, this page is very simple:
# admin/subscribers_delete.php
	<?php
	require_once 'config.php';
	login_required();
	$id = (int) $_GET['id'];
	$link = new mysqli(DB_SERVER, DB_USER, DB_PASSWORD, DB_NAME) or die('There was a problem connecting to the database.');
	$sql = "DELETE FROM subscribers WHERE id=$id LIMIT 1";
	$stmt = $link->query($sql) or die($link->error);
	if($link->affected_rows) {
	    $_SESSION['success'] = "Subscriber deleted.";
	} else {
	    $_SESSION['error'] = 'Nothing deleted.';
	}
	header('Location: subscribers.php');
Step 8:Messages
I will tell you upfront, this section has the most pages. We will be working with seven now, and creating one more in Step 10. First, we are going to create our messages table with this SQL:
CREATE TABLE `messages` (
	   `id` tinyint(10) AUTO_INCREMENT,
	   `subject` varchar(255),
	   `leftcol` text,
	   `rightcol` text,
	   `template_id` tinyint(10),
	   PRIMARY KEY (`id`)
	) ENGINE=MyISAM DEFAULT CHARSET utf8;
Next, we'll create the files for this step. Creates seven files, each named messages.php, messages_delete.php, messages_edit.php, messages_new.php, messages_new_step2.php, messages_new_step3.php, and messages_preview.php. Let's first open up messages.php and make it look like:
# admin/messages.php
	<?php
	require_once 'config.php';
	login_required();
	$title = "messages";
	$tab = 'mess';
	$table = "";
	$messages = query("SELECT * FROM messages ORDER BY id ASC");
	foreach($messages as $row) {
	    $slink = '<a href="messages_send.php?id='.$row['id'].'" title="send message"><img src="media/images/email_go.png" alt="send message"/></a>';
	    $plink = '<a href="messages_preview.php?id='.$row['id'].'" target="_new" title="preview"><img src="media/images/find.png" alt="preview"/></a>';
	    $dlink = '<a href="messages_delete.php?id='.$row['id'].'" onclick="return confirm(\'Are you sure you want to delete this message?\');" title="delete"><img src="media/images/delete.png" alt="delete"/></a>';
	    $elink = '<a href="messages_edit.php?id='.$row['id'].'" title="edit"><img src="media/images/page_edit.png" alt="edit"/></a>';
	    $table .= '<tr><td>'.$row['id'].'</td><td>'.$row['subject'].'</td><td><a href="" onClick="window.open(\'templates_preview.php?id='.$row['template_id'].'\',width=800,height=600)" title="preview"><img src="media/images/find.png" alt="preview"/></a></td><td>'.$slink.' '.$plink.' '.$dlink.' '.$elink.'</td></tr>';
	}
	$message = error_messages();
	$content = <<<EOF
	<a href="messages_new.php" class="large">new message »</a>
	$message
	<table>
	    <tr>
	        <th></th>
	        <th>subject</th>
	        <th>template</th>
	        <th></th>
	    </tr>
	    $table
	</table>
	EOF;
	include 'layout.php'; ?>
This is our routine table, except we now have 4 'extra' links now, one to send the message, one to preview, one to edit, and one to delete. Your page should look like:


Now we are going to start work on our new pages. The first page is where all messages start out, and then you can progress on and enter the actual message on the next page. The reason for this is because we first need to create the initial message in the DB and so we can find information about the template. The step2 page is basically the edit page (there are six line differences according to FileMerge). Open up our new file and paste the following:
# admin/messages_new.php
	<?php
	require_once 'config.php';
	login_required();
	$tab = 'mess';
	if(isset($_POST['subject'])) {
	    $link = new mysqli(DB_SERVER, DB_USER, DB_PASSWORD, DB_NAME) or die('There was a problem connecting to the database.');
	    $sql = "INSERT INTO messages (subject, template_id) VALUES ( '".$_POST['subject']."' , ".$_POST['template'].")";
	    $stmt = $link->query($sql) or die($link->error);
	    $i = query("SELECT id FROM messages WHERE subject='".$_POST['subject']."' AND template_id=".$_POST['template']." ");
	    $id = $i[0]['id'];
	    $stmt->close;
	    $_SESSION['success'] = "Added template.";
	    header('Location: messages_new_step2.php?id=' + $id);
	}
	$title = "new message";
	$templates = query("SELECT id,name,columns FROM templates");
	$tselect = '<select name="template">';
	foreach($templates as $row) {
	    $tselect .= '<option value="'.$row['id'].'">'.$row['name'].'</option>';
	}
	$tselect .= "</select>";
	$content = <<<EOF
	<form action="messages_new.php" method='POST'>
	    <p>
	        <label for="subject">Subject:</label><br />
	        <input type='text' name='subject' class="text" />
	    </p>
	    <p>
	        <label for="template">Template:</label>
	        $tselect
	    </p>
	    <p>
	        <button onclick="">Continue »</button>
	    </p>
	</form>
	EOF;
	include 'layout.php'; ?>
This page is very similar to what our other new pages look like, but this one was one change in the POST block. Right after we perform the SQL INSERT, we find the most recent insert id. Now this is not the perfect solution, but I prefer it to performing another SQL query to find a row using unindexed columns. This step should look like:


We then redirect to step2, so let's open up the file:
# admin/messages_new_step2.php
	<?php
	require_once 'config.php';
	login_required();
	$title = "new message - step 2";
	$tab = 'mess';
	$id = (int) $_GET['id'];

	$mess = query("SELECT * FROM messages WHERE id=$id");
	$message = $mess[0];
	$subject = $message['subject'];

	$templates = query("SELECT id,name,columns FROM templates");
	$tselect = '<select name="template">';
	foreach($templates as $row) {
	    if($message['template_id'] == $row['id']) {
	        $selected = ' selected="selected"';
	        if($row['columns'] == "1") {
	            $textareas = '<p><label for="body">Body: (raw html)</label><br /><textarea name="body" rows="35"></textarea></p>';
	        } else {
	            $textareas = '<p><label for="leftcol">Left column: (raw html)</label><br /><textarea name="leftcol" rows="35"></textarea></p>
	            <p><label for="rightcol">Right column: (raw html)</label><br /><textarea name="rightcol" rows="35"></textarea></p>';
	        }

	    } else {$selected = '';}
	    $tselect .= '<option value="'.$row['id'].'"'.$selected.'>'.$row['name'].'</option>';
	}
	$tselect .= '</select>';

	// Check for a POST
	if(isset($_POST['submitted'])) {
	    $link = new mysqli(DB_SERVER, DB_USER, DB_PASSWORD, DB_NAME) or die('There was a problem connecting to the database.');
		$template = query("SELECT columns FROM templates WHERE id=".$message['template_id']);
	    if($template[0]['columns'] == "1") {
	        $body = mysql_real_escape_string($_POST['body']);
	        $sql = "UPDATE messages SET subject='".$_POST['subject']."', leftcol='$body' WHERE id=$id";
	    } else {
	        $leftcol = mysql_real_escape_string($_POST['leftcol']);
	        $rightcol = htmlentities($_POST['rightcol']);
	        $sql = "UPDATE messages SET subject='".$_POST['subject']."', leftcol='$leftcol', rightcol='$rightcol' WHERE id=$id";
	    }
	    $stmt = $link->query($sql) or die($link->error);
	    $stmt->close;
	    header('Location: messages_new_step3.php?id='.$id);
	}

	$content = <<<EOF
	<form action="messages_new_step2.php?id=$id" method='POST'>
	    <p>
	        <label for="subject">Subject:</label><br />
	        <input type='text' name='subject' class="text" value="$subject"/>
	    </p>
	    <p>
	        <label for="template">Template:</label>
	        $tselect
	    </p>
	    $textareas
	    <p>
	        <input type='submit' value='Continue »' />
	        <input type='hidden' value='1' name='submitted' />
	    </p>
	</form>
	EOF;
	include 'layout.php'; ?>
Hopefully you have gotten the gist of all the pages and understand the page above. We have our normal heading. we then set our id from our GET request. Next we find the message we are working with, then we find all the templates and construct a drop down. We also use this look to define whether we will have one or two textareas. Next we have our POST block, which creates the link, then checks to see if we are working with one or two columns and creates the appropriate SQL query. After that we have our form. Your form should look like:


Now we will continue onto step 3, so open up the file and paste:
# admin/messages_new_step3.php
	<?php
	require_once 'config.php';
	login_required();
	$title = "new message - step 3";
	$id = (int) $_GET['id'];
	$tab = 'mess';

	$mess = query("SELECT * FROM messages WHERE id=$id");
	$message = $mess[0];
	$subject = $message['subject'];

	$content = <<<EOF
	<a href="messages_preview.php?id=$id" class="large" target="_new">preview »</a><br />
	<p>Do you want to <a href="messages.php" class="large">return to messages</a> or <a href="messages_send.php?id=$id" class="large">send the message</a>?</p>
	EOF;
	include 'layout.php';
	?>
The page is very simple and is the end of creating a message. It offers us a few links. The first is a link to preview the message. The next offers to take us back home. The third offers to take us to send the message (Step 10). The page looks like:


Now we are going to continue on to our edit page. I will not explain it as it is the same file as messages_new_step2.php, so you can refer there.
# admin/messages_edit.php
	<?php
	require_once 'config.php';
	login_required();
	$title = "edit message";
	$id = (int) $_GET['id'];
	$tab = 'mess';

	$mess = query("SELECT * FROM messages WHERE id=$id");
	$message = $mess[0];
	$subject = $message['subject'];

	$templates = query("SELECT id,name,columns FROM templates");
	$tselect = '<select name="template">';
	foreach($templates as $row) {
	    if($message['template_id'] == $row['id']) {
	        $selected = ' selected="selected"';
	    } else {$selected = '';}
	    $tselect .= '<option value="'.$row['id'].'"'.$selected.'>'.$row['name'].'</option>';
	}
	$tselect .= '</select>';

	$mid = $message['template_id'];
	$template = query("SELECT id,name,columns FROM templates WHERE id=$mid");
	if($template[0]['columns'] == "1") {
	    $textareas = '<p><label for="body">Body: (raw html)</label><br /><textarea name="body" rows="35">'.$message['leftcol'].'</textarea></p>';
	} else {
	    $textareas = '<p><label for="leftcol">Left column: (raw html)</label><br /><textarea name="leftcol" rows="35">'.$message['leftcol'].'</textarea></p>
	    <p><label for="rightcol">Right column: (raw html)</label><br /><textarea name="rightcol" rows="35">'.$message['rightcol'].'</textarea></p>';
	}

	// Check for a POST
	if(isset($_POST['submitted'])) {
	    $link = new mysqli(DB_SERVER, DB_USER, DB_PASSWORD, DB_NAME) or die('There was a problem connecting to the database.');
	    if($template[0]['columns'] == "1") {
	        $body = mysql_real_escape_string($_POST['body']);
	        $sql = "UPDATE messages SET subject='".$_POST['subject']."', leftcol='$body' WHERE id=$id";
	    } else {
	        $leftcol = mysql_real_escape_string($_POST['leftcol']);
	        $rightcol = htmlentities($_POST['rightcol']);
	        $sql = "UPDATE messages SET subject='".$_POST['subject']."', leftcol='$leftcol', rightcol='$rightcol' WHERE id=$id";
	    }
	    $stmt = $link->query($sql) or die($link->error);
	    $stmt->close;
	    $_SESSION['success'] = "Edited message.";
	    header('Location: messages.php');
	}

	$content = <<<EOF
	<form action="messages_edit.php?id=$id" method='POST'>
	    <p>
	        <label for="subject">Subject:</label><br />
	        <input type='text' name='subject' class="text" value="$subject"/>
	    </p>
	    <p>
	        <label for="template">Template:</label>
	        $tselect
	    </p>
	    $textareas
	    <p>
	        <input type='submit' value='Save »' />
	        <input type='hidden' value='1' name='submitted' />
	    </p>
	</form>
	EOF;
	include 'layout.php'; ?>
The page will look almost identical to our step 2, but the textarea will have content. Now we will create the delete page with:
# admin/messages_delete.php
	<?php
	require_once 'config.php';
	login_required();
	$id = (int) $_GET['id'];
	$link = new mysqli(DB_SERVER, DB_USER, DB_PASSWORD, DB_NAME) or die('There was a problem connecting to the database.');
	$sql = "DELETE FROM messages WHERE id=$id LIMIT 1";
	$stmt = $link->query($sql) or die($link->error);
	if($link->affected_rows) {
	    $_SESSION['success'] = "Message deleted.";
	} else {
	    $_SESSION['error'] = 'Nothing deleted.';
	}
	header('Location: messages.php'); ?>
That page should also look familiar. The final page we are going to work on in this step is our preview page, so open it up and place:
# admin/messages_preview.php
	<?php
	require_once 'config.php';
	login_required();
	$id = (int) $_GET['id'];

	$mess = query("SELECT * FROM messages WHERE id=$id");
	$message = $mess[0];
	$subject = $message['subject'];
	$tid = $message['template_id'];

	$data = query("SELECT body,columns FROM templates WHERE id=$tid LIMIT 1");
	$template = $data[0]['body'];

	if($data[0]['columns'] == "1") {
	    $leftcol = $message['leftcol'];
	    $body = str_replace('%content%', $leftcol, $template);
	} else {
	    $leftcol = $message['leftcol'];
	    $rightcol = $message['rightcol'];
	    $b = str_replace('%leftcol%', $leftcol, $template);
	    $body = str_replace('%rightcol%', $rightcol, $b);
	}
	?>
	<?php echo $body; ?>
	<button type="button" onclick="self.close();">close window</button>
This file is somewhat different than you have seen, so I'll walk you through it. First have have our normal heading. Next we find the current message we are working with, and set a few variables to the results. Next we find the template we are working with and set a variable equal to the body. Next, we have a conditional statement that checks to see the number of columns the template has. If it has we use the PHP function str_replace to replace the %content% tag we have with our actual content. Otherwise, we first perform a str_replace for the left column, and then on the result of that we perform str_replace again for the right column. Now we are ready to continue onto the front-end.
Step 9:The Front-End
We have finally reached the front-end! For this step and this step only, I will assume the files we are working with are in the root of the project (so not the admin folder, the one containing it). We are going to be working with four files here, so go ahead and create index.php, preferences.php, subscribe.php and a style.css file. First open up our index.php file and paste:
# index.php
	<?php
	require_once 'admin/config.php';
	$newsletters = query("SELECT * FROM newsletters WHERE visible=1");
	$subscriptions = '';
	foreach($newsletters as $nl) {
	    $subscriptions .= '
	    <input type="checkbox" name="newsletter['.$nl["id"].'][subscribe]" value="true" '.$checked.'/>
	    <label for="newsletter['.$nl["id"].']">'.$nl['name'].'</label>
	    <input type="hidden" name="newsletter['.$nl["id"].'][nlid]" value="'.$nl['id'].'" /><br />
	    '.$nl["description"].'<br />
	    ';
	}
	?>
	<!DOCTYPE html PUBLIC "-//W3C//DTD XHTML 1.1//EN" "https://www.w3.org/TR/xhtml11/DTD/xhtml11.dtd">
	<html xmlns="https://www.w3.org/1999/xhtml" >
	    <head>
	        <meta http-equiv="Content-Type" content="text/html; charset=utf-8" />

	        <title>my newsletters</title>
	        <!-- Stylesheets -->
	        <link rel="stylesheet" href="style.css" type="text/css" media="all" />
	    </head>
	    <body>
	        <div id="header">
	            <h1>my newsletters</h1>
	        </div>
	        <div id="container">
	            <h3>Subscribe to our newsletters!</h3>
	            <form action="subscribe.php" method="POST">
	                <p>
	                    <label for="name">Name:</label><br />
	                    <input type='text' name='name' class="text" />
	                </p>
	                <p>
	                    <label for="email">Email</label><br />
	                    <input type="text" name="email" class="text" />
	                </p>
	                <p>
	                    <strong>Newsletters:</strong><br />
	                    <?php echo $subscriptions; ?>
	                </p>
	                <p>
	                    <input type='submit' value='Subscribe »' />
	                    <input type='hidden' value='1' name='submitted' />
	                </p>
	            </form>
	        </div>
	    </body>
	</html>
I'll explain the page first and then we will get to the picture so-far and the page styling. In the PHP section at the top we require our config.php file (now in the admin directory), then find all of our publicly visible newsletters and create a check box array. You will notice that we are not handling the POSTed data here, and I chose to do that in our subscribe.php, and we will get to that, but first let's style the page. The page should currently look like:

First I added the 960.gs reset file like I did in our other stylesheet. Then I added the three following styles to make the design look like:
# style.css
	#header, #container {width:65%;margin:0 auto; padding:0.7%;}
	#container {background:#ccc;}
	form input.text {width:95%; font-size:16px;}
#message.success {border:solid 1px #349534; background:#C9FFCA;color:#008000;} 

So now that we have a clean and simple page, we are going to continue on and work on our subscribe.php file. Go ahead and open the file and paste:
# subscribe.php
	<?php
	require_once 'admin/config.php';

	if(isset($_POST['submitted'])) {
	    $link = new mysqli(DB_SERVER, DB_USER, DB_PASSWORD, DB_NAME) or die('There was a problem connecting to the database.');
	    $name = $_POST['name'];
	    $email = $_POST['email'];

	    $sql = "INSERT INTO subscribers (name, email) VALUES ('$name', '$email')";
	    $stmt = $link->query($sql) or die($link->error);
	    $stmt->close;

	    $sql = "SELECT id FROM subscribers WHERE name='$name' AND email='$email' LIMIT 1";
	    $subscriber = query($sql);
	    $id = $subscriber[0]['id'];

	    foreach($_POST['newsletter'] as $n) {
	        if($n['subscribe'] == "true") { // If we want to subscribe but the record doesnt exist
	            $nlid = $n['nlid'];
	            $sql = "INSERT INTO subscriptions (subscriber_id, newsletter_id) VALUES ('$id', '$nlid')";
	            $stmt = $link->query($sql) or die($link->error);
	            $stmt->close;
	        }
	    }
	} else {header('Location: index.php');}
	?>
	<!DOCTYPE html PUBLIC "-//W3C//DTD XHTML 1.1//EN" "https://www.w3.org/TR/xhtml11/DTD/xhtml11.dtd">
	<html xmlns="https://www.w3.org/1999/xhtml" >
	    <head>
	        <meta http-equiv="Content-Type" content="text/html; charset=utf-8" />

	        <title>my newsletters</title>
	        <!-- Stylesheets -->
	        <link rel="stylesheet" href="style.css" type="text/css" media="all" />
	    </head>
	    <body>
	        <div id="header">
	            <h1>my newsletters</h1>
	        </div>
	        <div id="container">
	            <h3>Thank you for subscribing!</h3>
	        </div>
	    </body>
	</html>
This page is very much like our edit subscribers page, but no DELETE SQL queries happen here. We simply check to make sure we have all POSTed data. We then set a few variables to our POSTed data, and then create and perform a SQL INSERT query to add the person to our subscribers table. After which we perform a SQL query to find that just created subscriber (insert_id was not working this time for me). We then loop through all of the POSTed newsletters and check to see if we want to subscribe to them, and perform SQL INSERTs when needed. If all goes to plan, you see a nice screen like the one below:


We have on last page here to work on, and that is the preferences.php file. This is where a user can edit their email subscription. I am going to split the page in two. First we have our PHP block:
# preferences.php
	<?php
	require_once 'admin/config.php';

	if(isset($_POST['submitted'])) {
	    $id = (int) $_POST['id'];
	    $link = new mysqli(DB_SERVER, DB_USER, DB_PASSWORD, DB_NAME) or die('There was a problem connecting to the database.');
	    $sql = "UPDATE subscribers SET name='".$_POST['name']."', email='".$_POST['email']."' WHERE id=$id";
	    $stmt = $link->query($sql) or die($link->error);
	    $stmt->close;

	    foreach($_POST['newsletter'] as $n) {
	        if($n['exists'] != '1' && $n['subscribe'] == "true") { // If we want to subscribe but the record doesnt exist
	            $nlid = $n['nlid'];
	            $sql = "INSERT INTO subscriptions (subscriber_id, newsletter_id) VALUES ('$id', '$nlid')";
	            $stmt = $link->query($sql) or die($link->error);
	            $stmt->close;
	        } elseif ($n['exists'] == '1' && $n['subscribe'] != "true") {// Else if we had an exits but we want to unsubscribe
	            $subid = $n['subid'];
	            $sql = "DELETE FROM subscriptions WHERE id=$subid LIMIT 1";
	            $stmt = $link->query($sql) or die($link->error);
	            $stmt->close;
	        }
	    }
	    $_SESSION['success'] = "Preferences saved.";
	}

	if(isset($_GET['email'])) {$email = $_GET['email']; $display = 'form';} else {$display = 'find';}

	$subscriber = query("SELECT * FROM subscribers WHERE email='$email'");
	if($subscriber || $display == 'find') {
	    $id = $subscriber[0]['id'];
	    $name = $subscriber[0]['name'];
	    $email = $subscriber[0]['email'];
	} else {header('Location: index.php');}

	$newsletters = query("SELECT * FROM newsletters WHERE visible=1");
	$subs = query("SELECT * FROM subscriptions WHERE subscriber_id='".$id."'");
	$subscriptions = '';
	foreach($newsletters as $nl) {
	    $s = false;
	    $subid = '';
	    foreach($subs as $sub) {
	        if($sub['newsletter_id'] == $nl['id']) {$s = true; $subid = $sub['id'];}
	    }
	    $checked = ($s == true) ? 'checked="checked"' : '';
	    $subscriptions .= '
	    <input type="checkbox" name="newsletter['.$nl["id"].'][subscribe]" value="true" '.$checked.'/>
	    <label for="newsletter['.$nl["id"].']">'.$nl['name'].'</label>
	    <input type="hidden" name="newsletter['.$nl["id"].'][exists]" value="'.$s.'" />
	    <input type="hidden" name="newsletter['.$nl["id"].'][nlid]" value="'.$nl['id'].'" />
	    <input type="hidden" name="newsletter['.$nl["id"].'][subid]" value="'.$subid.'" /><br />
	    ';
	}
	$message = error_messages();
	?>
In this block, a lot is going on. First, we include our config file. Next, we check for a POST, and if we have one, we update our database. This portion is copied exactly from our subscribers_edit.php file so you can look there for a bit more explanation. Next depending on if we have a get request, we set our variable (this variable is used in the HTML section of the page). We then look for a subscriber with that email, and if one exists or we are showing the find portion, we continue, otherwise we are redirected home. Next we find all of our newsletters, and all of the subscriber's subscriptions, and then create our checkbox form. The HTML portion looks like:
# preferences.php
	<!DOCTYPE html PUBLIC "-//W3C//DTD XHTML 1.1//EN" "https://www.w3.org/TR/xhtml11/DTD/xhtml11.dtd">
	<html xmlns="https://www.w3.org/1999/xhtml" >
	    <head>
	        <meta http-equiv="Content-Type" content="text/html; charset=utf-8" />

	        <title>my newsletters - my preferences</title>
	        <!-- Stylesheets -->
	        <link rel="stylesheet" href="style.css" type="text/css" media="all" />
	    </head>
	    <body>
	        <div id="header">
	            <h1>my newsletters</h1>
	        </div>
	        <div id="container">
	            <h3>my preferences</h3>
	            <?php if($display == 'form') {?>
	            <form action="preferences.php" method="POST">
	                <p>
	                    <label for="name">Name:</label><br />
	                    <input type='text' name='name' class="text" value="<?php echo $name; ?>"/>
	                </p>
	                <p>
	                    <label for="email">Email</label><br />
	                    <input type="text" name="email" class="text" value="<?php echo $email; ?>"/>
	                </p>
	                <p>
	                    <strong>Newsletters:</strong><br />
	                    <?php echo $subscriptions; ?>
	                </p>
	                <p>
	                    <input type='submit' value='Save my preferences »' />
	                    <input type='hidden' value='1' name='submitted' />
	                    <input type='hidden' value='<?php echo $id; ?>' name='id' />
	                </p>
	            </form>
	            <?php } else { ?>
	            <?php echo $message; ?>
	            <form action='preferences.php' method="get">
	                <p>
	                    <label for="email">Email</label><br />
	                    <input type="text" name="email" class="text" />
	                </p>
	                <p>
	                    <input type='submit' value='Find »' />
	                </p>

	            </form>
	            <?php } ?>
	        </div>
	    </body>
	</html>
In our HTML block we have two forms and some PHP to choose which one to display. The top form is the form the user sees if a record in the database has been found. The second form is for entering your email and having the system find it. The second form looks like:


And the first looks like:

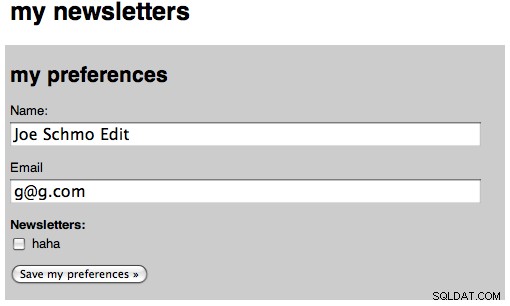
And the second form after we saved our preferences:


Now that we have finished the front-end, we have one last step:sending the emails!
Step 10:Sending Messages
Our last step is to work on the page to send our message. We will be working in the admin directory, and only one file will be created. Go ahead and create our messages_send.php file and place the following in it:
# admin/messages_send.php
	<?php
	require_once 'config.php';
	login_required();
	$title = "send message";
	$id = (int) $_GET['id'];
	$tab = 'mess';

	if(isset($_POST['submitted'])) {
	    $query = "SELECT * FROM subscribers WHERE id=0 ";
	    $emails = array();
	    foreach($_POST['newsletter'] as $n) {
	        if($n['send'] == "true") {
	            $nlid = $n['nlid'];
	            $e = query("SELECT subscriber_id FROM subscriptions WHERE newsletter_id=$nlid");
	            foreach($e as $s) {
	                $sqlids .= " OR id=".$s['subscriber_id'];
	            }
	            $query .= $sqlids;
	        }
	    }
	    $subscribers = query($query);
	    foreach($subscribers as $sub) {
	        $emails[$sub['email']] = $sub['name'];
	    }
	    $from = array(FROM_EMAIL => FROM_NAME);
	    // BODY RENDERING
	    $mess = query("SELECT * FROM messages WHERE id=$id");
	    $message = $mess[0];
	    $subject = $message['subject'];
	    $tid = $message['template_id'];

	    $data = query("SELECT body FROM templates WHERE id=$tid LIMIT 1");
	    $template = $data[0]['body'];

	    if($message['rightcol'] == '') {
	        $leftcol = $message['leftcol'];
	        $body = str_replace('%content%', $leftcol, $template);
	    } else {
	        $leftcol = $message['leftcol'];
	        $rightcol = $message['rightcol'];
	        $b = str_replace('%leftcol%', $leftcol, $template);
	        $body = str_replace('%rightcol%', $rightcol, $b);
	    }

	    send_email_to_mass($from, $emails, $body, $subject) or die('lol');
	    header('Location: index.php');
	}

	$newsletters = query("SELECT * FROM newsletters");
	foreach($newsletters as $nl) {
	    $nls .= '
	    <input type="hidden" name="newsletter['.$nl["id"].'][nlid]" value="'.$nl['id'].'" />
	    <input type="checkbox" name="newsletter['.$nl["id"].'][send]" value="true" '.$checked.'/>
	    <label for="newsletter['.$nl["id"].']">'.$nl['name'].'</label> - '.$nl['description'].'<br />
	    ';
	}
	$mess = query("SELECT * FROM messages WHERE id=$id");
	$message = $mess[0];
	$subject = $message['subject'];

	$content = <<<EOF
	<a href="messages_preview.php?id=$id" class="large" target="_new">preview »</a><br />
	<form action='messages_send.php?id=$id' method="POST">
	    <p>
	        Subject: $subject<br />
	    </p>
	    <p>Send to:<br />
	        $nls
	    </p>
	    <p>
	        <input type='submit' value='Send »' />
	        <input type='hidden' value='1' name='submitted' />
	    </p>
	</form>
	EOF;
	include 'layout.php'; ?>
The first part we again require our config, then make sure the user is logged in, then our title, make sure our id is an integer, and then set our tab. Next we have our complicated post block. First we set up our base query, and running just that would return 0 records, which is good because that means no users will be send the newsletter. Next we loop through every newsletter that we want to send to, and find all of the subscriptions for that newsletter. We then create a string that will be appended to our original SQL query so that we can find every subscriber. Now, we run that query and create an array where the keys are the emails and the name is the value, and this helps us use names when the user looks at the email in their mail application, showing the TO:as their name. We next find the message we are working with, and set the subject, message, and template id to variables. We then find our template and set the body to a variable. Then we use the same code from the message preview to replace the strings inside the template the the parts of the message. Then we call our yet-to-be-created-function send_email_to_mass and then redirect home.
Leaving our POST block, we create the same checkbox list of newsletters so the admin can pick which one(s) he wants to send the message to. Then we have a simple form that looks like:


Now, open up our classes.php file and add the following function:
# admin/classes.php
	// EMAIL
	function send_email_to_mass($from, $recipients, $body, $subject) {
	    require_once 'swift/lib/swift_required.php'; //require lib

	    $transport = Swift_MailTransport::newInstance();
	    $mailer = Swift_Mailer::newInstance($transport) or die('Error creating mailer.');
	    $message = Swift_Message::newInstance($subject)
	        ->setFrom($from)
	        ->setTo($recipients)
	        ->setBody($body, 'text/html') or die('error here.');
	    $result = $mailer->batchSend($message);

	    return true;
	}
So first, we have our function declaration, and it expects four variables to be passed to it, from, recipients, body, and subject. Next we require the sqift_required.php file of our Swift Mailer Library. Next we create a new Mail Transport (this uses the PHP mail function, so it would be sending from your local machine, for the documentation on the three transport types, see the documentation). Next we create a mailer using that transport. Then we create a new message from our subject, then set our from, to, and body. Then we use the batch_send function so that each recipient only sees themselves on the email, and no one else.
There is one possibly downside of doing it the way I have, and that is if you are sending many messages, the page may take forever to load. A solution to tthis would be running a Javascript AJAX request to send each and every message, but I won't cover that here. Now that we have finished working on sending messages, we are going to spice up the home page and then we will be done!
Step 11:The Homepage
When you load the admin index, the page does not really do much. I want to have some 'stats' on our homepage, and we will finally use the count_query function. Open up the admin index file and change it to look like:
# admin/index.php
	<?php
	require_once 'config.php';
	login_required();
	$users = count_query("SELECT COUNT(*) AS num FROM users");
	$emails = count_query("SELECT COUNT(*) AS num FROM subscribers");
	$subs = count_query("SELECT COUNT(*) AS num FROM subscriptions");
	$nls = count_query("SELECT COUNT(*) AS num FROM newsletters");
	$mess = count_query("SELECT COUNT(*) AS num FROM messages");
	$temps = count_query("SELECT COUNT(*) AS num FROM templates");
	$title = "Home!";
	$content = <<<EOF
	<h3>current stats</h3>
	<p>$users user registered</p>
	<p>$emails subscribers</p>
	<p>$subs newsletter subscriptions</p>
	<p>$nls newsletters</p>
	<p>$mess messages</p>
	<p>$temps templates</p>
	EOF;
	include 'layout.php'; ?>
The page is very simple. We require our config, make sure we are logged in, then we perform six count queries, one for each of our tables and then output that. This is what the final page look like:


